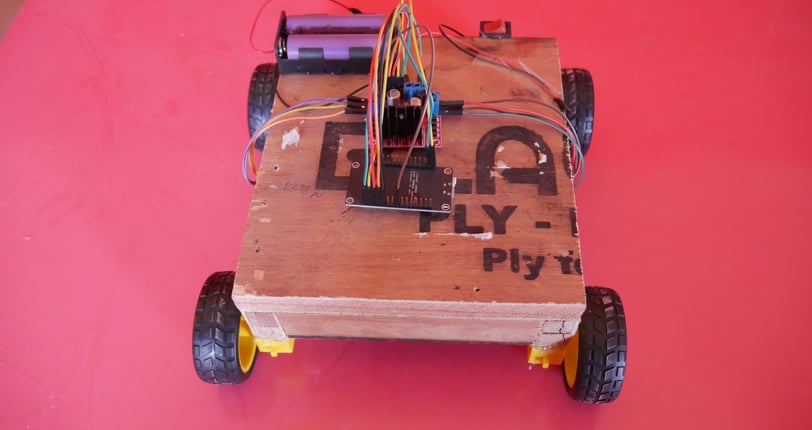
Smartphone Controlled Wi-Fi Car
Blog post description.


In today's technologically advanced world, it's essential for children to engage in hands-on projects that foster creativity, problem-solving skills, and a deep understanding of technology. Our children embarked on an exciting journey to create a smartphone-controlled Wi-Fi car, and here's how they did it.
Materials and Components
Microcontroller: ESP8266 (Node MCU)
Motor Driver: L298N
DC Motors: 2 (with wheels)
Chassis: Car chassis with motor mounts
Power Supply: Battery pack (7.4V Li-ion)
Smartphone: For controlling the car
Breadboard and Jumper Wires: For connections
Software: Arduino IDE and Blynk App
Planning and Design
The first step was brainstorming and planning the car's design. Our children sketched out their ideas, deciding on the type of chassis, the positioning of motors, and the overall look of the car.
Building the Chassis
They started with the car chassis, attaching the DC motors to the motor mounts and securing the wheels. This provided the basic structure for their Wi-Fi car.
Wiring the Components
One of the student from the team connected the DC motors to the L298N motor driver. The motor driver is crucial as it allows the microcontroller to control the motors' speed and direction.
They then connected the motor driver to the ESP8266 Node MCU, which would serve as the brain of the car, enabling wireless control through Wi-Fi.
Programming the Microcontroller
Using the Arduino IDE, the team wrote a program to control the car's movements. They implemented code to receive commands from the smartphone via the Blynk App and translate them into motor actions.
The code included setting up the Wi-Fi connection, defining motor control pins, and handling input commands from the Blynk App.
Setting Up the Blynk App
On their smartphones, they installed the Blynk App and created a new project. They added buttons to control the car's forward, backward, left, and right movements.
The app was configured to send commands to the ESP8266 Node MCU over Wi-Fi, allowing real-time control of the car.
Testing and Troubleshooting
The children tested the car, ensuring that all connections were secure and the code functioned correctly. They made adjustments as needed, troubleshooting any issues with motor response or Wi-Fi connectivity.
Final Assembly
Once everything was working smoothly, they finalized the assembly, securing all components on the chassis and ensuring that the car was robust and ready for action.
